Sunday, May 23, 2010

Checkerboard Slipper Tutorial

A while ago a buddy gave me a holey pair of slippers that his grandma had made for him in hopes that I could reproduce them. Flash forward a year, during which time I still hadn’t gotten around to making them, when one of the Knit knack girls started talking about these checkerboard slippers they wanted to make. I didn’t really pay attention to it until I saw the picture - it was the exact pattern that he had asked me to make! Naturally, when something like that falls into your lap, you know you can’t put it off any more, so I quickly made them up for him.

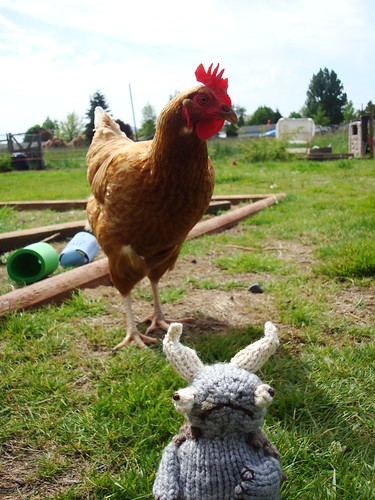
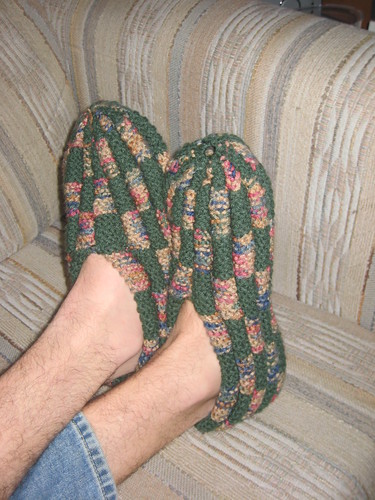
(those are his hairy legs, not mine)

Recently I was messaged by a couple of knitters for advice on making these rad slippers, so I thought that I’d go ahead and make a photo tutorial of the major features of the pattern. The original pattern is written well enough, but simply lacks pictures of any kind.

The first thing that you need to understand about this pattern is that its structure is based on the biggest NO-NO of colorwork: carrying your unused color tightly. 99.9% of the time when you are working with multiple colors you want to carry the yarn loosely on the backside of your work, however with this pattern, you actually need to pull the non-working yarn tight. That’s what makes these neat bumps all over the slippers.


If you do it correctly, the backside will feel more smooth and flat, looking something like this:

You’ll also notice that the edge has a rippled effect. That’s okay! This will become the heel portion which will be stitched together.

The pattern tells you to anchor the contrasting color at beginning of each row, which just means that you need to twist the contrast color around the working color before the first stitch. In the picture below, white is the working color which twists around the green, kinda like this:

This anchoring of the yarn at the edge, along with pulling the stitches tight, will eventually make for a very nice turned edge, which should look like this:

When you’re working on the wrong side you have to switch your yarn colors between the needles to change color, much like when you are switching from knit to purl if you were ribbing. As shown in the picture below green has just been worked so I move that between my needles to the front (wrong side), and move the white between the needles to the back (right side) to begin knitting with the white.

The rest of the pattern should be fairly simple – just garter stitch knitting, simple decreases for the toe and then sewing seams.

Voila!

Tuesday, May 18, 2010

Alot of Winners

And the Alot competition winner is...

...drumroll...


Maiya! She sho' knitting Alot of Fun fur!


You also gotta love her creative use of photoshop to mimic the original illustrations from Hyperbole and a Half:


Maiya's acceptance speech:
Oh my god! First, I’d like to thank the academy. I’d also like to thank my husband. He’s put up with yarn all over the place, needles strewn hazardously and patiently listens to me mumbling craziness about short rows or yo’s or bitch about fun fur. I’d like to thank Allie for the idea. Without her sassy, smart-ass mouth, we might not ever care for alot. And finally, I’d like to thank my fellow knit knackers. You guys are such an inspiration. It is an honor to be nominated among such amazing talent.
cue music- cut to commercial

And of course her Alot Pattern can be found HERE

Some honorable mentions include Monte, with Alot of crochet


As well as Mary, who pointed out that Chickens eat Alot


thank you to all who participated, cheered on, and voted on ravelry!! I love you, Knit Knackers!!

Sunday, May 16, 2010

ALOT!!!!!!

Today is picture posting day for the I Knitted Alot Competition. I can't believe how much fun I had making this creature and I am so looking forward to seeing what all the other Knit Knackers came up with. I went for a felted Alot.


What the...??


Mom! Make it stop looking at me!


the unfelted and lumpy looking Alot


I hung uside down Alot!


Seriously, I'm utterly amazed at how much I learned with making this mythical monstrosity. Anyone who may be reading this but doesn't know how to knit, feel free to gloss over the next few paragraphs, as they really won't make sense to you. I'm kicking myself for not taking pictures in the process, since now I have to try to use my words to explain.

To start with, I knew I wanted to felt it and I also didn't want to have to worry about a ton of seaming, so it posed a bit of a challenge for me. The solution was to make the leg holes by putting a number of the stitches on the underside onto a holder, using a provisional cast on on a separate needle to continue knitting Alot in the round, then knitting up the rest of the body and head. After that was done I went back to do the legs, picking up the provisional and held stitches. Instead of closing up the legs, I made a flap for the bottom of the foot which was left open for the felting process then sewn after stuffing.

For the head, again, I didn't want to sew it on afterward (are you seeing a pattern of motivation here?) so I made a chin coming out of the body in the same way. at first I played around with making a gusset like you would for a thumb on a pair of mittens, but I realized that would take too long and would make too many rows on the top of the head. Instead, I went with a series of short rows, working back and forth adding a stitch at each short row until I had a substantial chin. At the same time, I decreased the stitches on the top side of the body.

For the bulgy eyes I basically made a button hole, then came back to pick up stitches in the hole after the head was completed. right off the bat I doubled the stitches that were picked up by knitting in front and back of every stitch. The before casting off I switched to the black. The white center was embroidered on later. Again, for the horns I just made a button hole and picked up stitches in the void.

The tooth and claws were made by picking up stitches. I'd rather pick up stitches than sew a seam any day!

Voting will take place over the next two days, then on Wednesday I will post the winner, as well as the full parade of Alot contestants. It's gonna be awesome!

Friday, May 14, 2010

Going, Going, Back, Back

I've just learned how to knit back backwards and I'm totally stoked about it. This technique is totally easy and fast that I can't believe that I didn't think of it myself! Basically, instead of turning your work to do a purl row, you keep the right side of your work facing you and you backwards knit from the right needle to the left. Here's what it looks like:


Ingenious, isn't it? Knitty has a great tutorial for knitting back backwards here: Put It In Reverse

The Summit Shawl I've been working on suggests using this technique, which makes sense because it has a bajillion small sections over which you use stockinette stitch. When I started the shawl I gave it a quick try, but I couldn't get my fingers to work it right and was getting frustrated. So I waited until had the pattern memorized and was completely comfortable with it, then gave it another shot. Success!

I think I'm giving up purling from here on out.

----------------------

Just a few more days left on the I Knitted Alot competition. My Alot is felted and drying as I type, and I cannot wait to post his picture here, along with a parade of other Alots.

Wednesday, May 5, 2010

Alot of Great Knitters

Oh boy, I did not expect that so many of the knit knackers would get as excited about the I knitted Alot competition as I am! This is a good thing, and I'm really looking forward to seeing what everyone has dreamed up. Already I can tell that we're going to have some hilarious results! Stay tuned, as I think I'll be posting alot of photos!

Meanwhile, I've been shirking most of my other knitted projects. Remember that Knit-along I started in January? Yeah, neither did I. I've only had a bit of progress on my Coffee tunic.


It's good mindless knitting for the most part, but that's part of the problem - it's a little too mindless. I think the end result (whenever that may be) will be lovely despite the not so attractive decreases. I take issue with the fact that the side decreases force the knitter to stop cabling at a certain point along the sides, so for several inches where were once cables there are just lines of stockingnette ribbing. There are much more attractive ways to shape a piece. And yeah, I am complaining without doing anything about it because I've hit the point of no return with this tunic and I just can't bear to frog it back to the first decrease, sit down with pencil and paper to figure out a better way to do it, and start over. Forget it! Honestly, it's the kind of detail that only a knitter would notice, so as long as I don't gift this to a fellow knitter I'll be in the clear. With that said, right here and now I vow to finish this before Christmas - mainly because I want to give it away, and what better time than christmas for giving?

I've also been working pretty steadily on the Summit Shawl, since the day that knitty posted their Spring + Summer issue.


I love this shawl! It's one of those addicting patterns where I find myself saying "just one more row, then I'll put it down" about 500 times before I actually do set it aside. It also helps that I found the reasonably priced yet divine to the touch Serenity Garden yarn at JoAnn's. I've been using the Grass colorway. I love the color, especially how it has fallen in color chunks. Unfortunately, this picture doesn't give it justice, largely due to me snapping the photos in low light.


And in case you were wondering, still no word back from Knitty as to whether or not they have accepted my mitts pattern for the First Fall issue. From what I gather around the Ravelry forums the longer it takes them to get back to you, the better your chances are that they will accept it. so nearly 2 months now and no news...

Sunday, May 2, 2010

I Knitted Alot - Competition

I’m kicking off the Alot knitting/crochet competition starting…right…NOW!

First go read Alot is Better Than You at Everything

The Competition: Who can knit or crochet the best Alot.

The Rules: You can get as creative as you want but you must use 90% fiber/yarn in the process and your results should be reproducible. Pictures need to be posted in the Ravelry Knit Knack group I Knitted Alot Competition thread on the Deadline date.

The Deadline: 2 weeks from now (so uhm…that would be May 16).

The Voting: will begin on Monday May 17 and end on Wednesday May 19 and will be held in the Knit Knack Group. I’ll deal with the HOW of voting later.

The Prize: Major bragging rights, and I’ll post your pattern (if you have one) on my blog! (I know, total motivation!)